Week 3 - Tutorial
Hello everyone,
Let's jump right into my third tutorial for KIT207. In this tutorial, I've learned about navigation and simple raycasting in Unity.
Navigation in Unity refers to the process of allowing game objects, typically characters, to move around a scene intelligently. Raycasting in Unity is a technique used to cast a ray from a starting point in a specified direction to detect objects or surfaces in a 3D scene.
Now, let's take a look at what I learned and what I created in this week's tutorial.
1. Navigation
Initially, I planned to use a scene from Mylo, but it had a different Unity version than mine. So, I decided to create a new scene myself. Here's my scene, suitable for calculating navigation

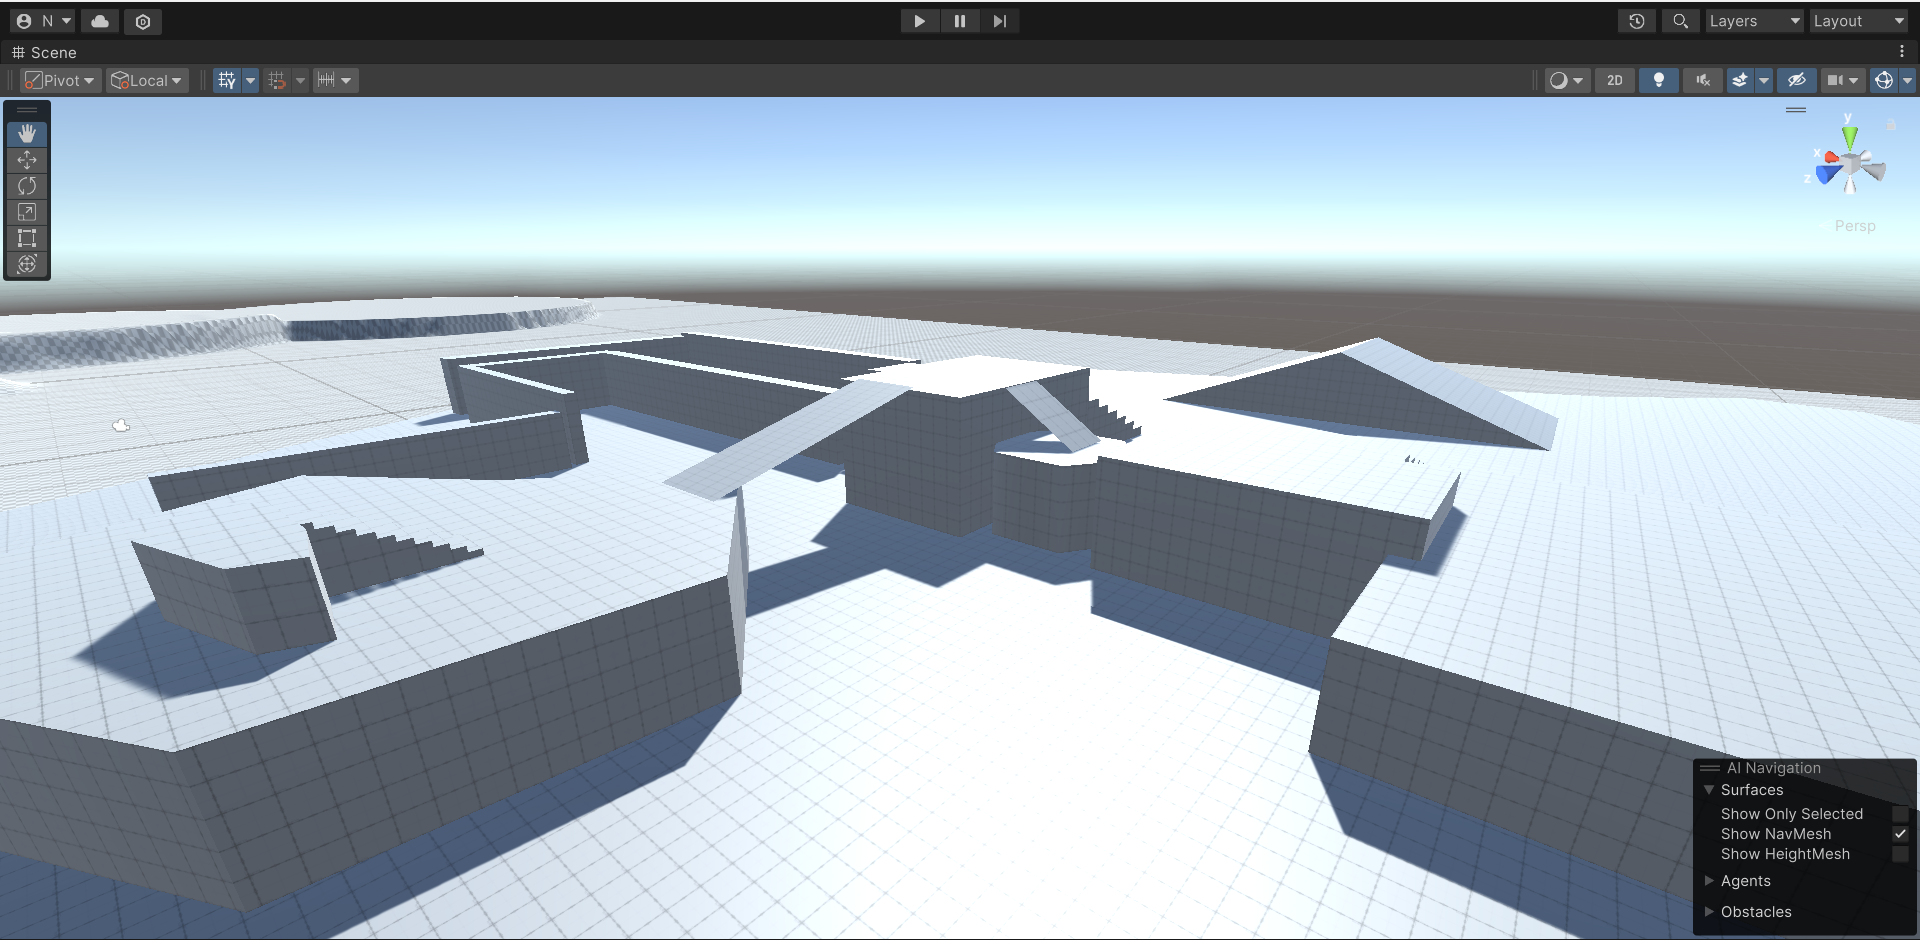
I then followed Mylo's instructions to create a NavMesh and link it to my player object.

I also experimented with changing different variables in the Navigation scene to see how they affected the behavior. But now, when I ran the scene again, nothing happened. So, let's move on to raycasting as a way to get the player capsule moving.
2. Raycasting
First, after reading the theory behind raycasting, I followed the instructions and wrote a script to allow my player capsule to move around based on the user's right mouse click. Here's my script:
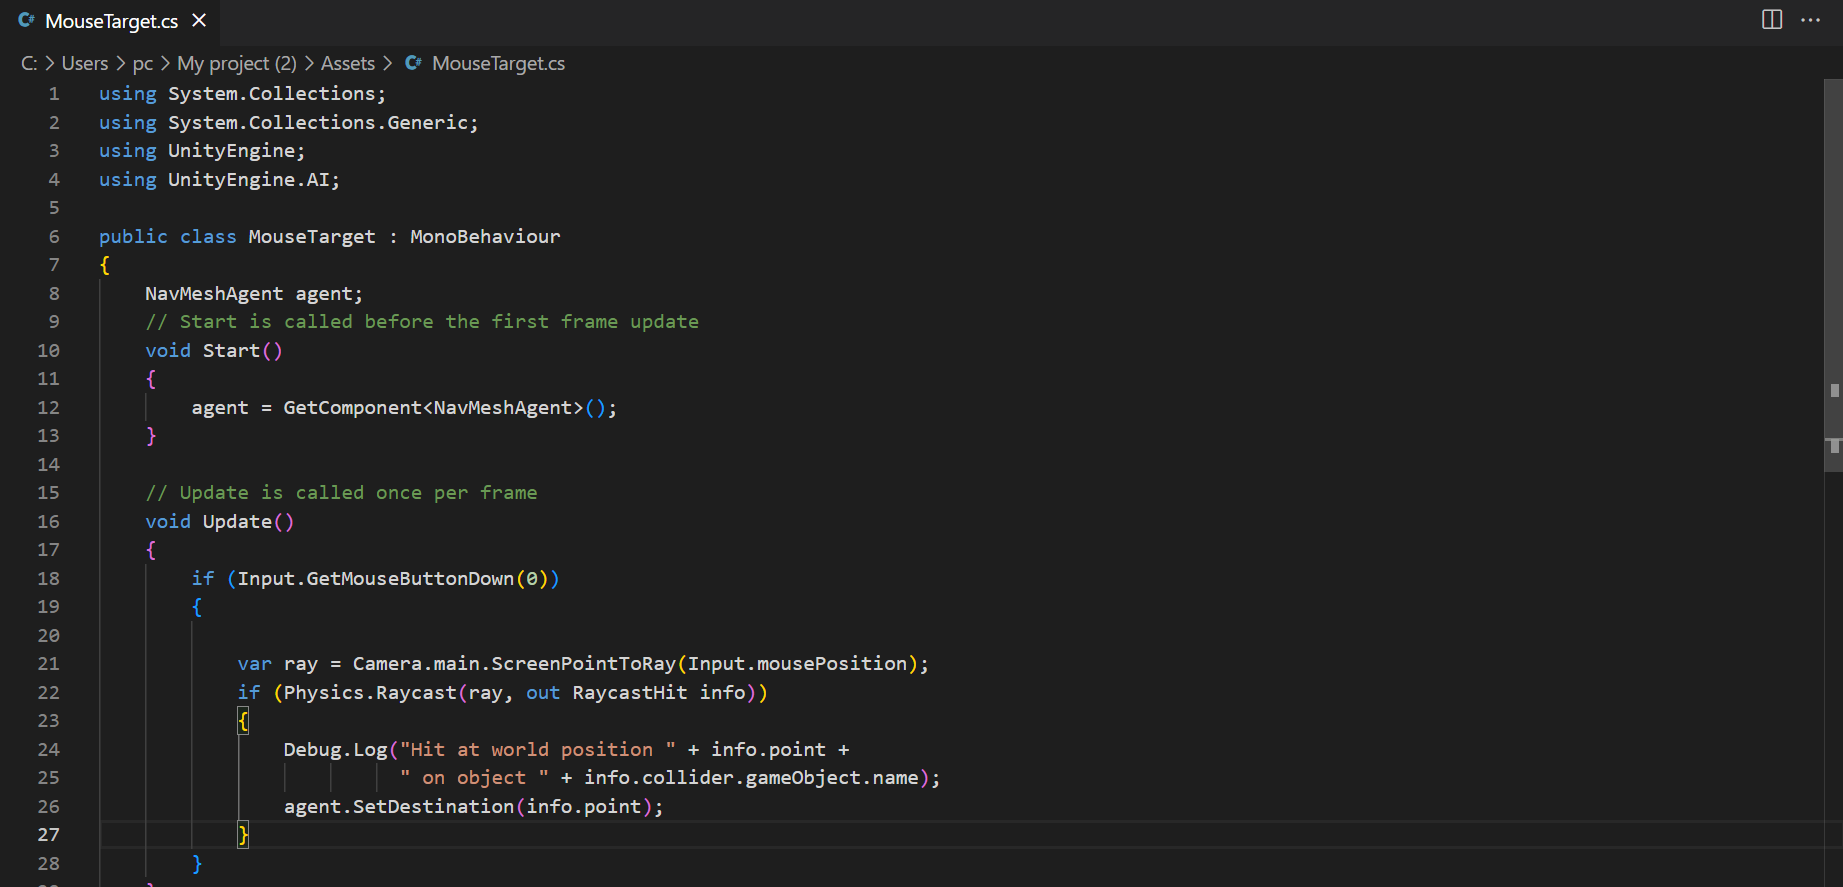
After using this script, I ran the code and it worked! Now, when I right-click anywhere on the scene, the character can move to that position. Here's a GIF to prove it (Sorry, my laptop isn't very powerful, so while the recording itself was smooth, the resulting GIF has some lag).

Next, I familiarized myself with NavMesh obstacles. I added a cube to my scene and resized it to act as my obstacle. Then, I attached the NavMesh Obstacle component to the cube to prevent my character capsule from moving through it. Here's another GIF to demonstrate (if applicable).
3 Portfolio Exercise
After learning about NavMesh and raycasting, I practiced creating a movable obstacle. First, I wrote a small script to make the obstacle move back and forth. Then, I added the NavMesh Obstacle component and enabled the "Carve" option. I also experimented with different values for "Carve Only Stationary" and "Move Threshold" to fine-tune the obstacle's behavior.
Finally, following Mylo's guidance, I removed the raycasting code from the agents. Then take the raycasting code, I leveraged the concepts within the agents to instantiate an enemy AI prefab at the player's click location. I achieved this by implementing a function (learned in KIT109) to spawn the enemy prefab and triggering it at the mouse click position. Additionally, I added a separate script to control the enemy AI's movement towards the player's capsule position.

This third tutorial was a bit challenging, but it provided valuable experience that I'll definitely use in my career. Thanks for reading and watching! See you next time!
Leave a comment
Log in with itch.io to leave a comment.